What is Nearpod?
Nearpod is a completely free teaching tool. The use of Nearpod in the classroom allows increased interaction between teachers and students and between students and students. Using this app, students can write – draw – discuss – answer multiple-choice or submit assignments to teachers and get instant feedback. More interestingly, it allows teachers to use all their available resources from websites, Powerpoint, videos… Teachers can completely embed existing data directly into this website without having to reformat it.
To use Nearpod, teachers need to create an account at the website: http://nearpod.com/
Detail instruction on how to use Nearpod:
1, Log in and register
- Go to http://nearpod.com
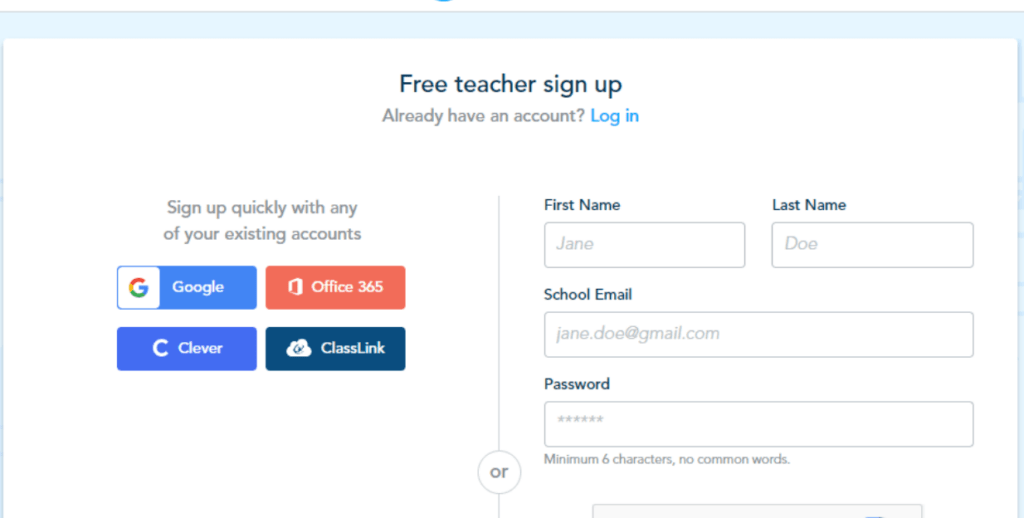
- Here, teachers click Sign Up for free to register or Log In to log in.
- At the registration interface, the teacher enters the information that the system requires.
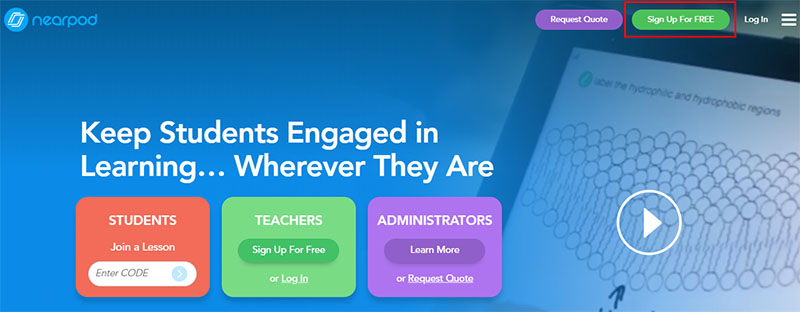
Teachers can also use Gmail or Office 365 accounts to register.
For students, just the code provided by the teacher to enter the class, no need to register
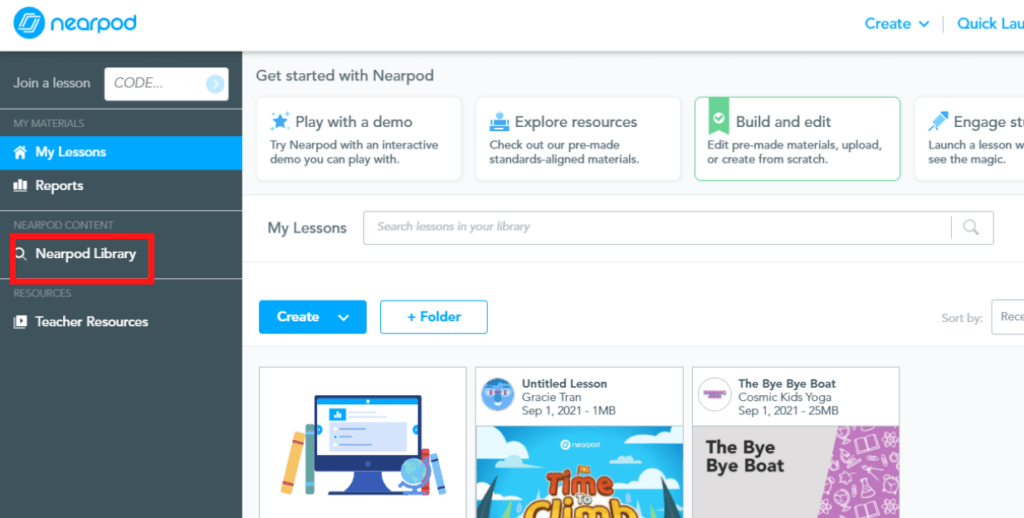
After successful registration, the teacher will see the interface as below.
2. Some functions of Nearpod
- My lesson: Teacher’s library
- Report: Report
- Teacher resources, Q&A and news from Nearpod
- Create a space for discussion and collaboration
- Create tests, assessments
- Create a reminder alarm
- Create a new lesson from Nearpod, Google slide, or create a Folder.
- Explore lesson templates that are available on the Nearpod system and can be reused
- Create a new lesson
3. Create a new lecture
3.1. CREATE LEARNING MODELS
Step 1: Click Nearpod Library to discover the pre-made lesson’s templates and contents
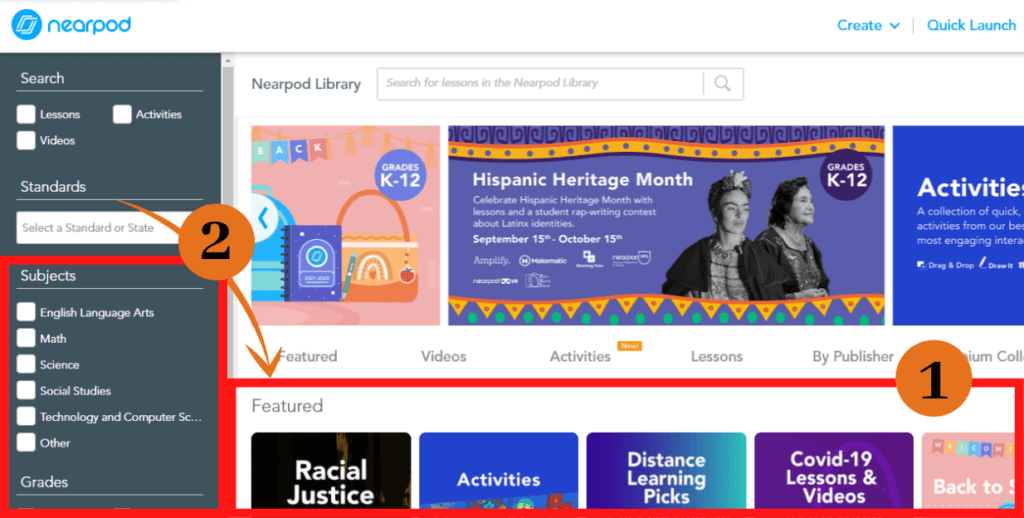
Step 2: Choose the topic of the lesson that the teacher wants to use
Step 3: The teacher continues to choose the sample lesson to use (1)
Or teachers can filter the choices displayed by clicking on the checkboxes (2) on the left side of the screen (click on subjects and grades that teachers need to refer to)
Here teachers will see both paid and free lectures, please choose according to your needs.
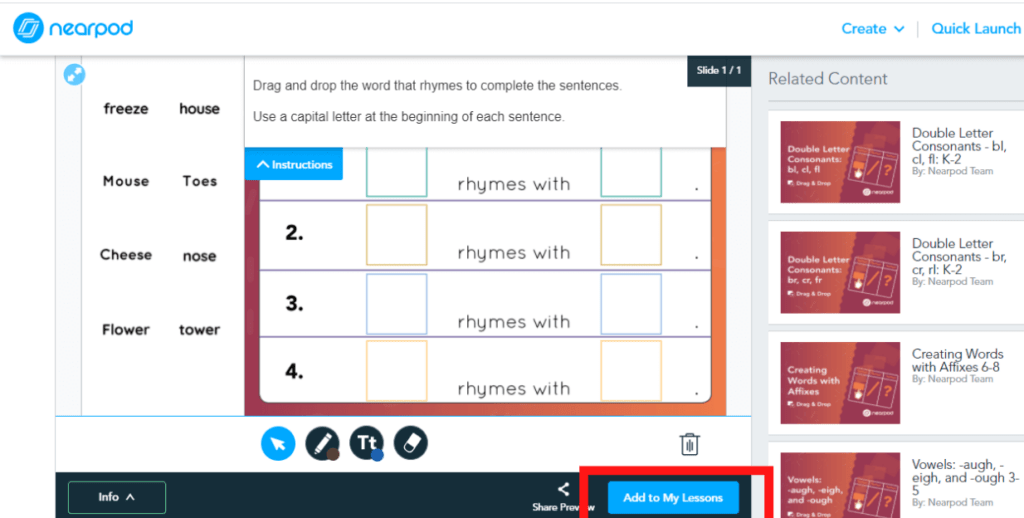
Step 4: After selecting, click Add to My Lessons to move your chosen slide into your teacher’s library
Next, click Show in My Lessons
Step 5: Click Edit to edit
Here teachers can edit directly or create a copy from this template.
3.2. CREATE A NEW LESSON
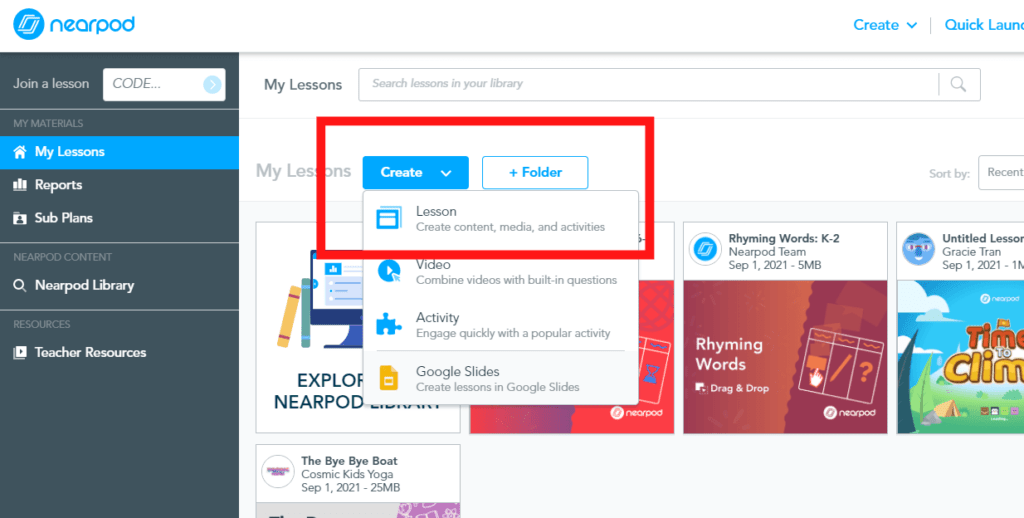
To create a new lesson, go to the teacher’s interface, or click “My lessons”—> click the button “CREATE” or you can create a slide from Google App (this is quite familiar to all teachers so we will not instruct further).
Step 1: Choose Lesson in CREATE
You will see the Untitled Lesson page as below.
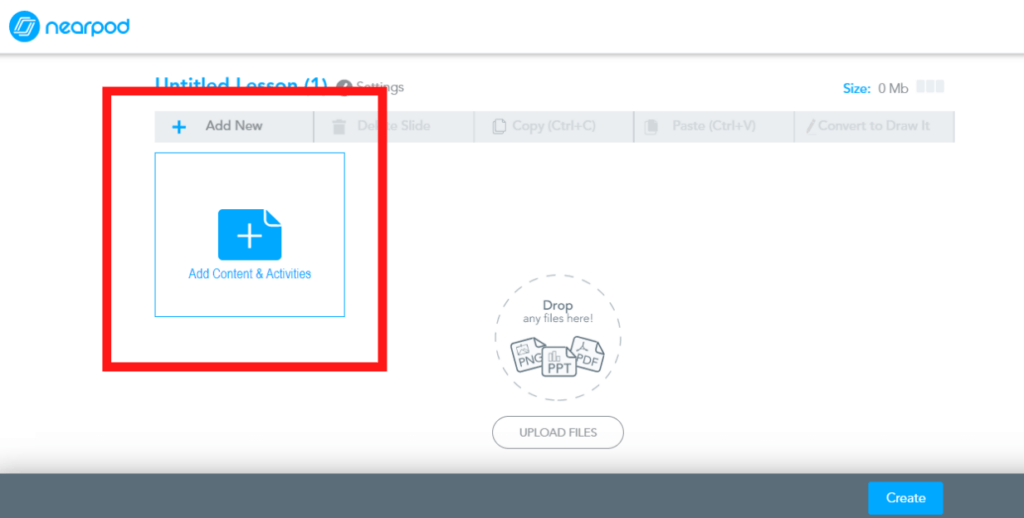 Add contents
Click “Add Contents & Activities” to find all types of files and elements you can add to your Lesson.
Here teachers can crate and add many types of content such as Slide, Nearpod 3D, Simulation from Phet, Field Trip, BBC Video, Sway, Slide, PDF, Vidoe, Audio, Twitter…into your lesson.
Click “Upload files” if you have already made a slide and want to upload it to present to the class.
Add an activity
Click “Activities” to see all choices of interactive activities you can add into your lesson! This is my favourite part!
Here teachers can choose among these choices(Teachers discover by themselves based on suggestions)
- Time to Climb: Timed multiple choice
- Open-Ended Question: Open Ended Question:
- Matching Pairs: Matching, pairing game.
- Quiz: Multiple-choice format.
- Flipgrid: Insert link from Flipgrid
- Draw it: draw on the board.
- Collaborate: Discuss, collaborate.
- Poll: Survey poll
- Fill in the blanks: Fill in the blanks
- Test memory: Test memory.
4. Use and show
Don’t forget to name your lesson. Click “Setting” (1) right next to the lesson’s name (Untitled lesson) to fill in all necessary information. When finish adding contents and activities, click “Save and exit”. (2)
When exiting the lesson, you will be moved back to the “My Lesson” page. You will find the newly-created lesson that you edited just now.
Click to select Live Lesson for presentation (Teachers can monitor student progress by clicking Student Paced)
Teachers share the code to get into the class to students (for example the code is H5N1V). Students can Join Lessons using Nearpod.com or App with the code given.
Remember to show to code somewhere easy to find on your screen and wait for students to enter the lesson and then start. You might encounter a little instruction board where Nearpod shows you a “Quick Tour” on how to present your lesson. Click “Got it, Next” to go through all the steps.
Are you facing difficulties in finding and securing teaching positions in Vietnam? Are visa procedures causing you trouble? Feeling overwhelmed and directionless upon your arrival in Vietnam for teaching assignments? Don’t worry, VTJ’s English Teaching Placement in Vietnam (EPIV) Program 2024 provides comprehensive support to solve ALL the matters.
👉👉👉 Click HERE to request free consultation


